Star Wars: Frontlines of the Republic
An original Star Wars-themed attraction combining narrative-driven scene design with PLC programming, choreographed figure motion control, and IR sensor integration built around the reliability, safety logic, and repeatability that professional themed entertainment systems demand.
Video Demonstrations
(Videos are sped up and trimmed from actual speed due to upload size limits)
The Story
Guests are transported to Umbara during the Clone Wars. In the wake of the 501st's victory over the traitorous General Pong Krell, the Separatists have exploited the Republic's internal turmoil to seize key territory. At the clone base, General Anakin Skywalker meets them with a mission: destroy a newly built Separatist droid factory.

After receiving your mission from General Skywalker, you join Captain Rex and the 501st, venturing through the jungle in search of the new Separatist droid factory
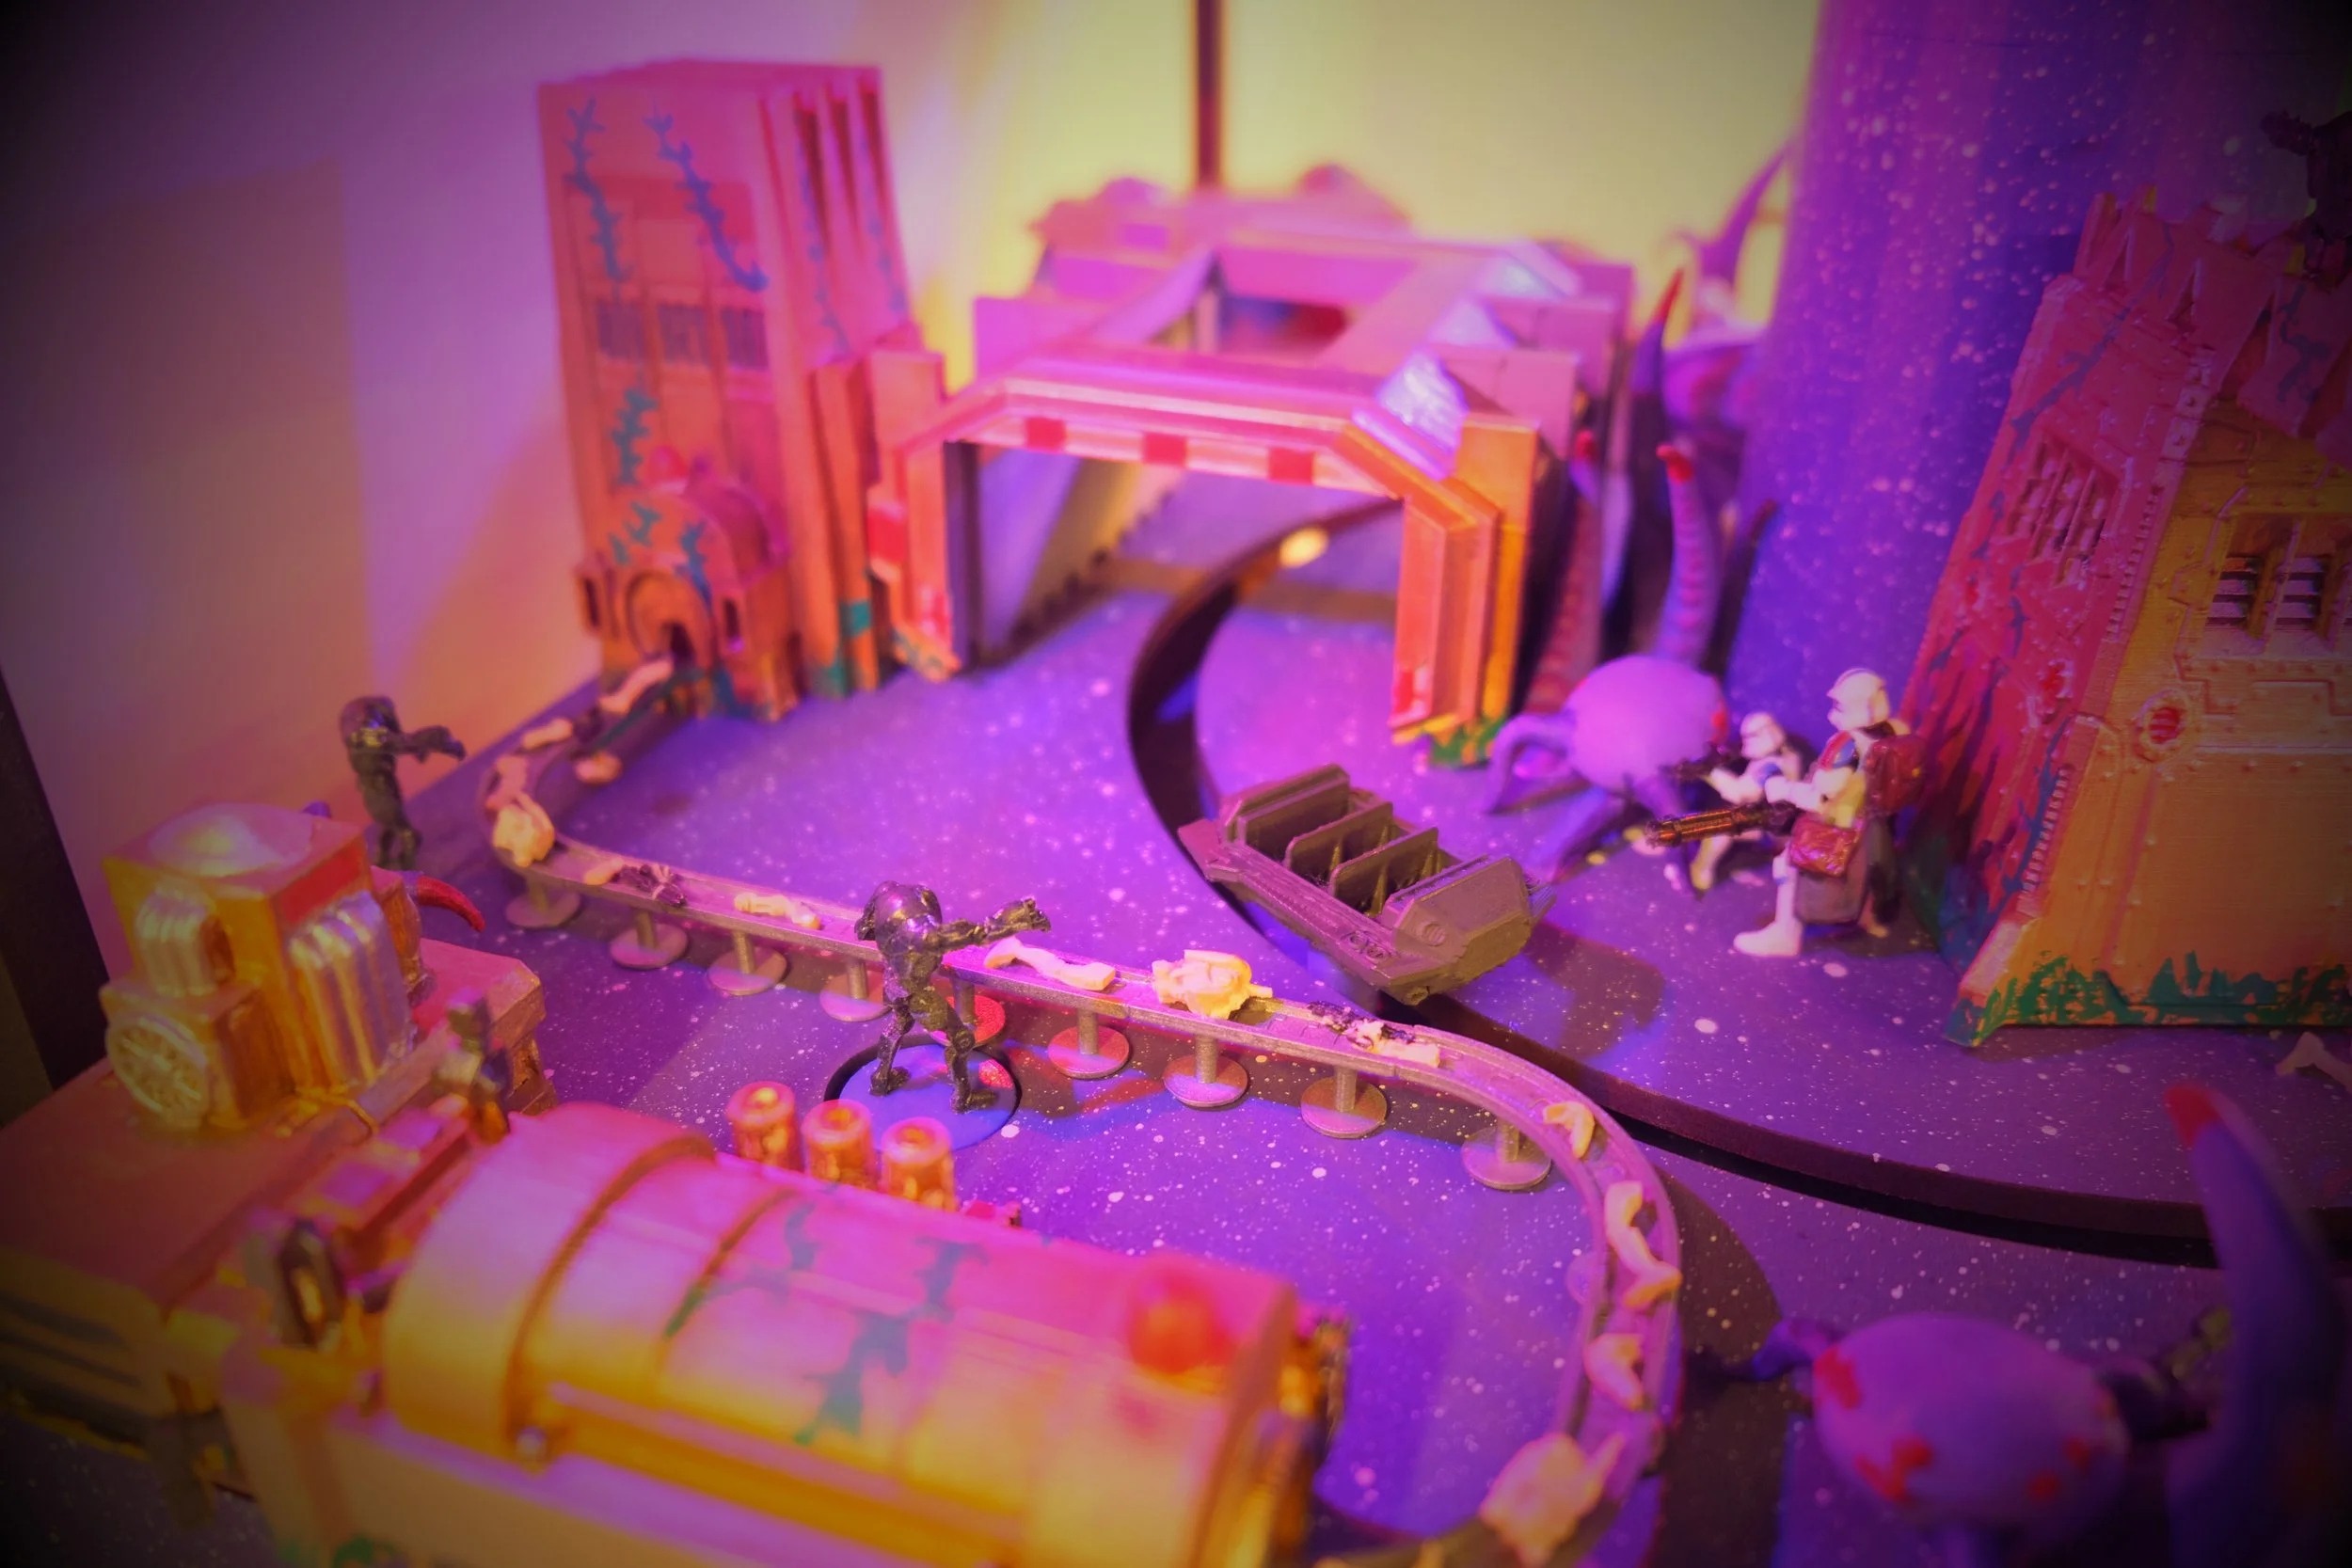
Suddenly, you are ambushed by a Separatist droid patrol caught in a firefight between the 501st and Separatist forces.

After narrowly escaping the Droid ambush, you make your way to the Separatist droid factory along with the 501st and destroy the factory.
“In my book, experience outranks everything” - Captain Rex
The Engineering
The attraction is built around two engineering systems working in concert: a mechanical drivetrain that physically moves the ride, and an electrical control architecture that decides when every show element fires. The mechanical side covers a stepper-driven turntable with custom 10:1 gear reduction, servo-actuated characters, and a multi-process fabrication workflow spanning Markforged, Formlabs, and Prusa platforms. The electrical side is anchored by an Arduino Opta PLC programmed in ladder logic per IEC 61131-3, with IR sensor zones closing the loop on vehicle position, a custom KiCad PCB handling power and signal distribution, and a deliberate split between deterministic PLC timing and microcontroller-driven motion. Together, they're built around the same principle the rest of the project is: reliability, repeatability, and the kind of fault-tolerant design real ride systems demand.
The Mechanical Systems
Ride Drivetrain
The ride system is a stepper-driven turntable. The core mechanical challenge was motion resolution: as the turntable's radius grew, the motor's minimum step size resulted in visibly jagged motion at the rim. The motor simply couldn't take small enough steps to keep the ride motion smooth at that scale.
The solution was a 10:1 gear reduction: ten motor revolutions per one turntable revolution. This served two purposes at once. It multiplied the effective resolution of each motor step, smoothing the ride motion, and brought the turntable's rotational speed down to the range required by the show timing.
The gear train was designed in SolidWorks and fabricated across three processes, each chosen for the load and behavior that the part needed to handle:
The driving spur gear was printed on a Markforged X7 in a Nylon CF blend, selected for the tensile and wear strength to handle the drive load coming directly off the motor.
The intermediate gear was printed on a Formlabs Fuse 1 in Nylon 12 GF powder. Its 100% infill gave it enough compliance to absorb motor shock while staying rigid enough to transmit torque cleanly. I first attempted this part in TPU 90A for its superior shock absorption, but it proved too compliant to hold gear geometry under load.
The driven output (inner spur gear) was printed on the Prusa Core One+ in Prusament PETG. This gear mounts to a quarter-inch laser-cut wood disc that the ship attaches to. It is shown detached here to expose the mechanical movement.
Character Actuation
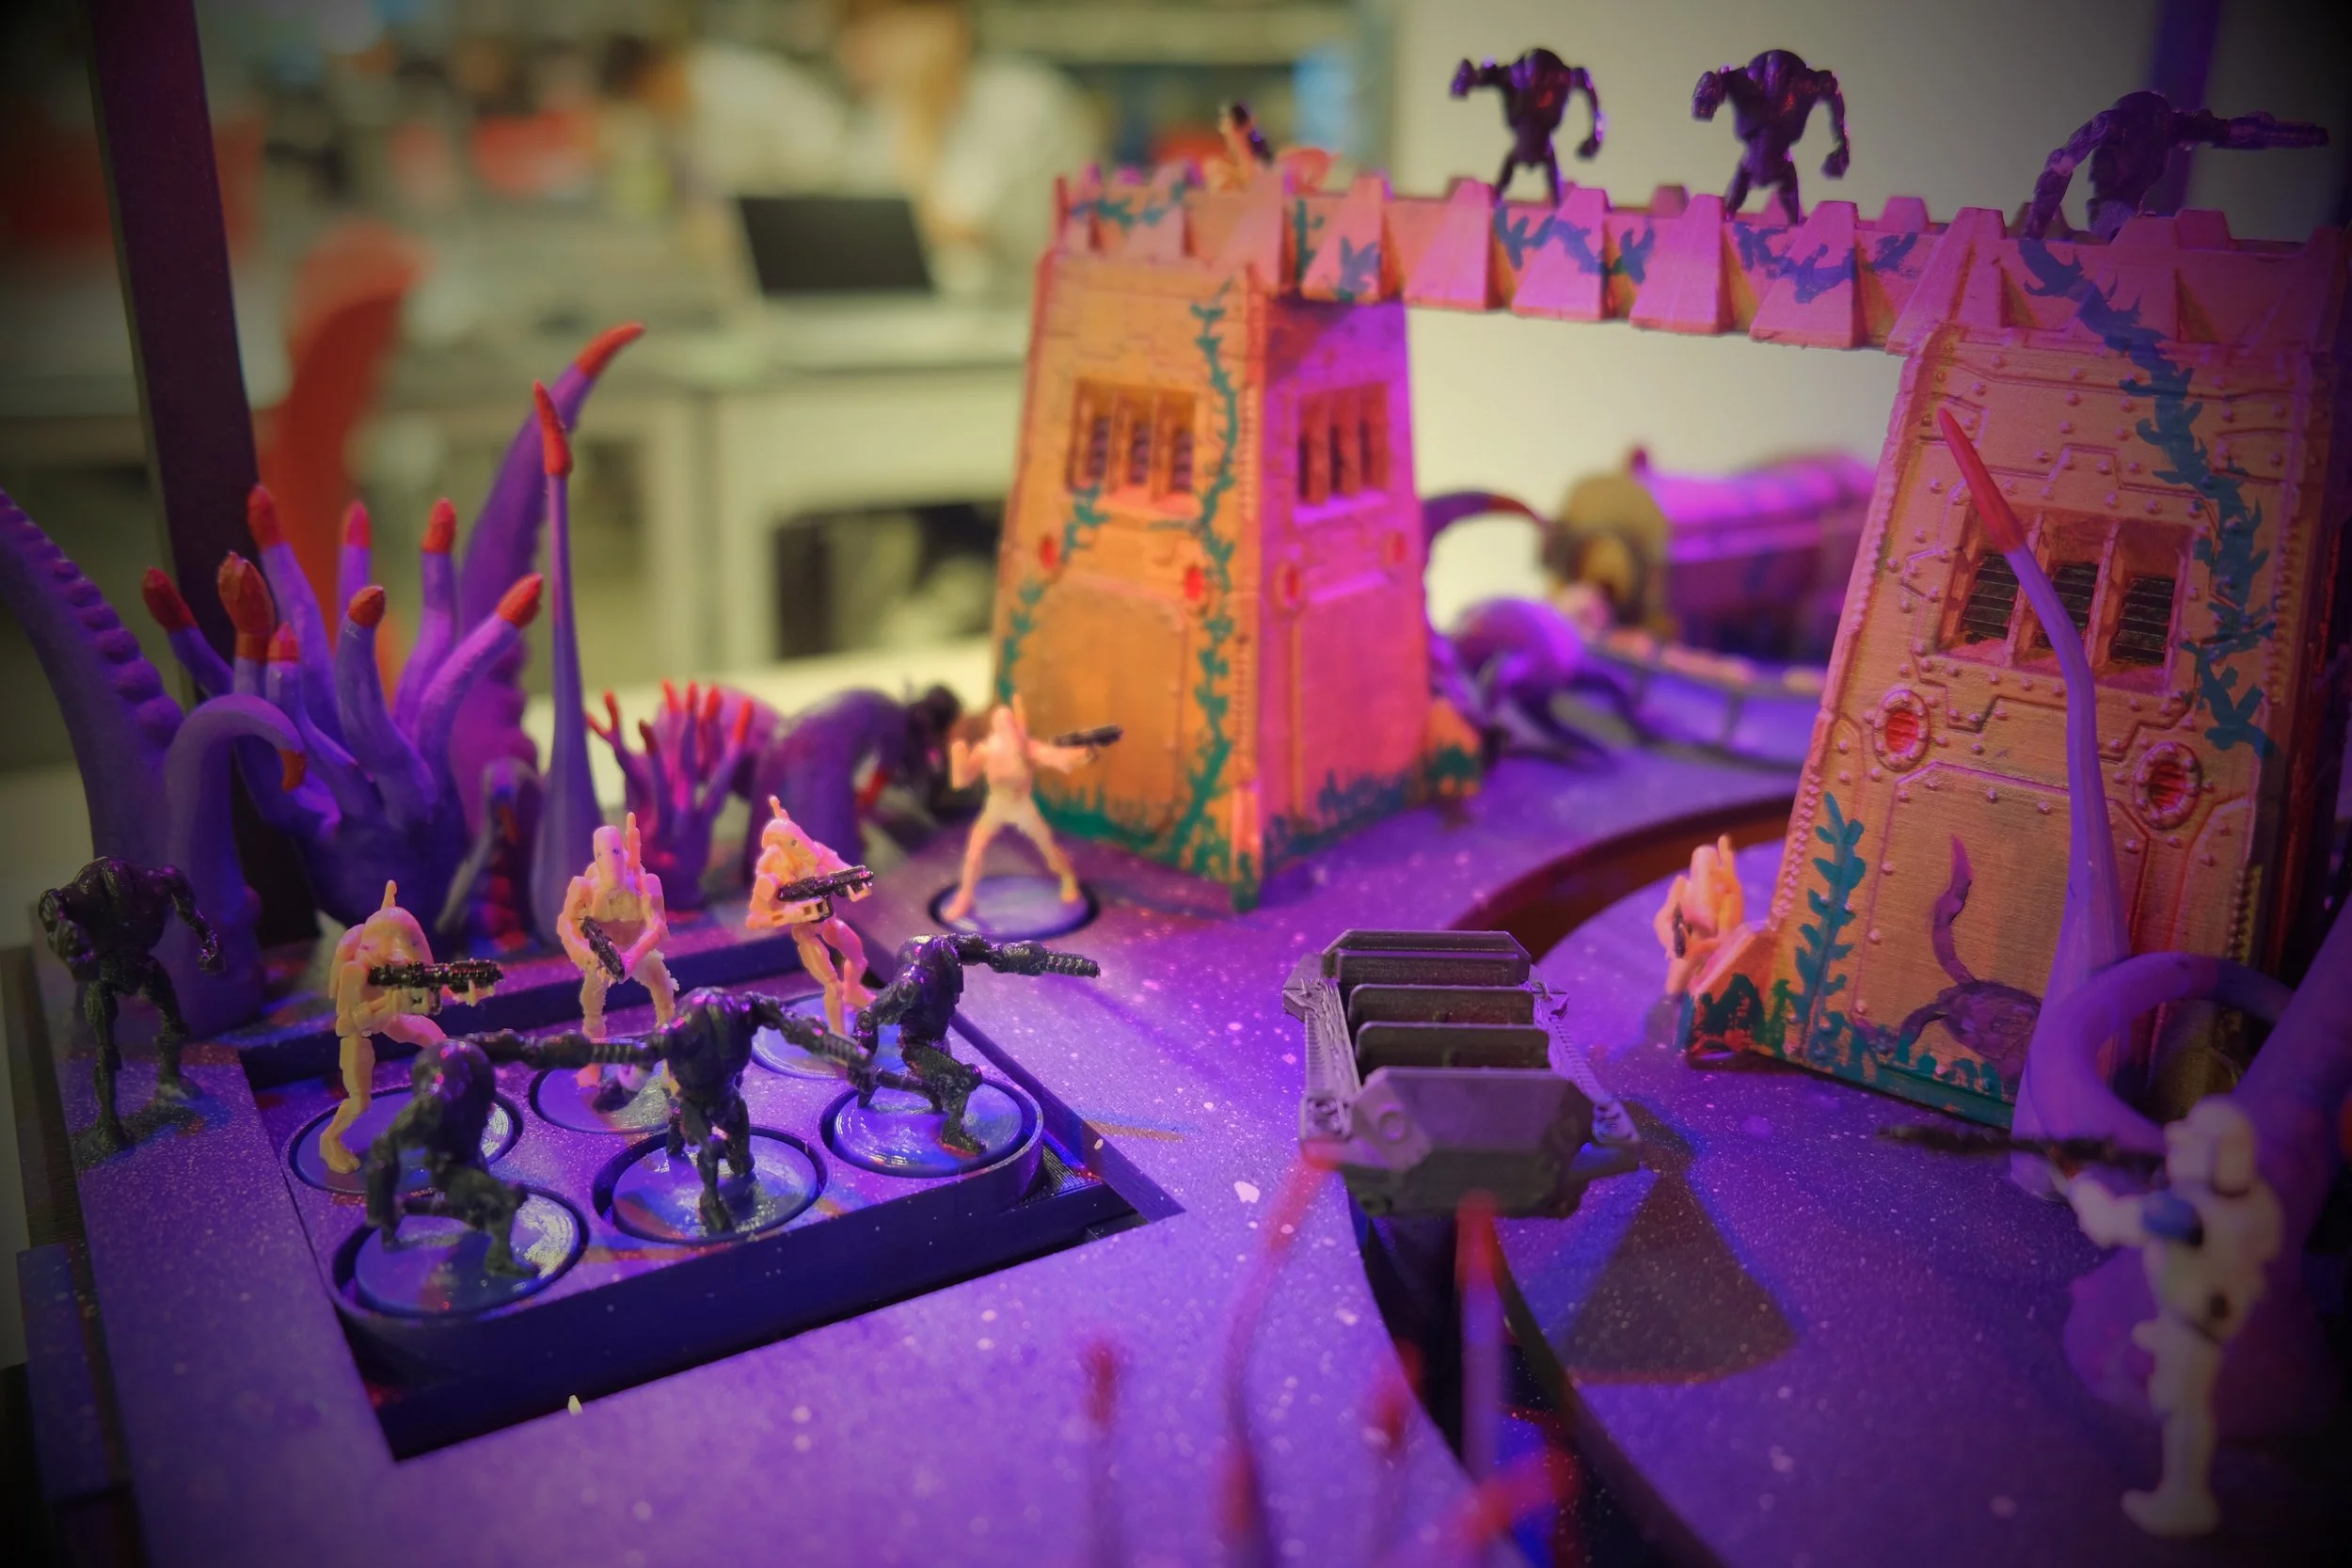
Individual characters are directly driven by servo motors, giving precise positional control over each figure's motion and timing as a show element. For example, the tan B1 battle droid nearest the overpass is its own directly driven servo.
Characters that move in unison are driven differently. Rather than one servo per figure, a single servo drives a rack and pinion with no gear reduction, converting one rotational input into shared linear motion so the whole group moves in registration off a single actuator. For example, the group of six droids near the left edge of the frame runs off one rack-and-pinion servo.
Enclosure & Structure
The floor and bottom covers were laser-cut from dimensions sketched in AutoCAD. The ceiling was fabricated on a handheld CNC, also from AutoCAD sketches, because the laser cutter's bed was too small to accommodate it. The ceiling needed to be a single continuous piece: splitting it would have required internal support structures that would have intruded on both the story space and the ride path.
The Electrical & Control Systems
Position Sensing & Architecture
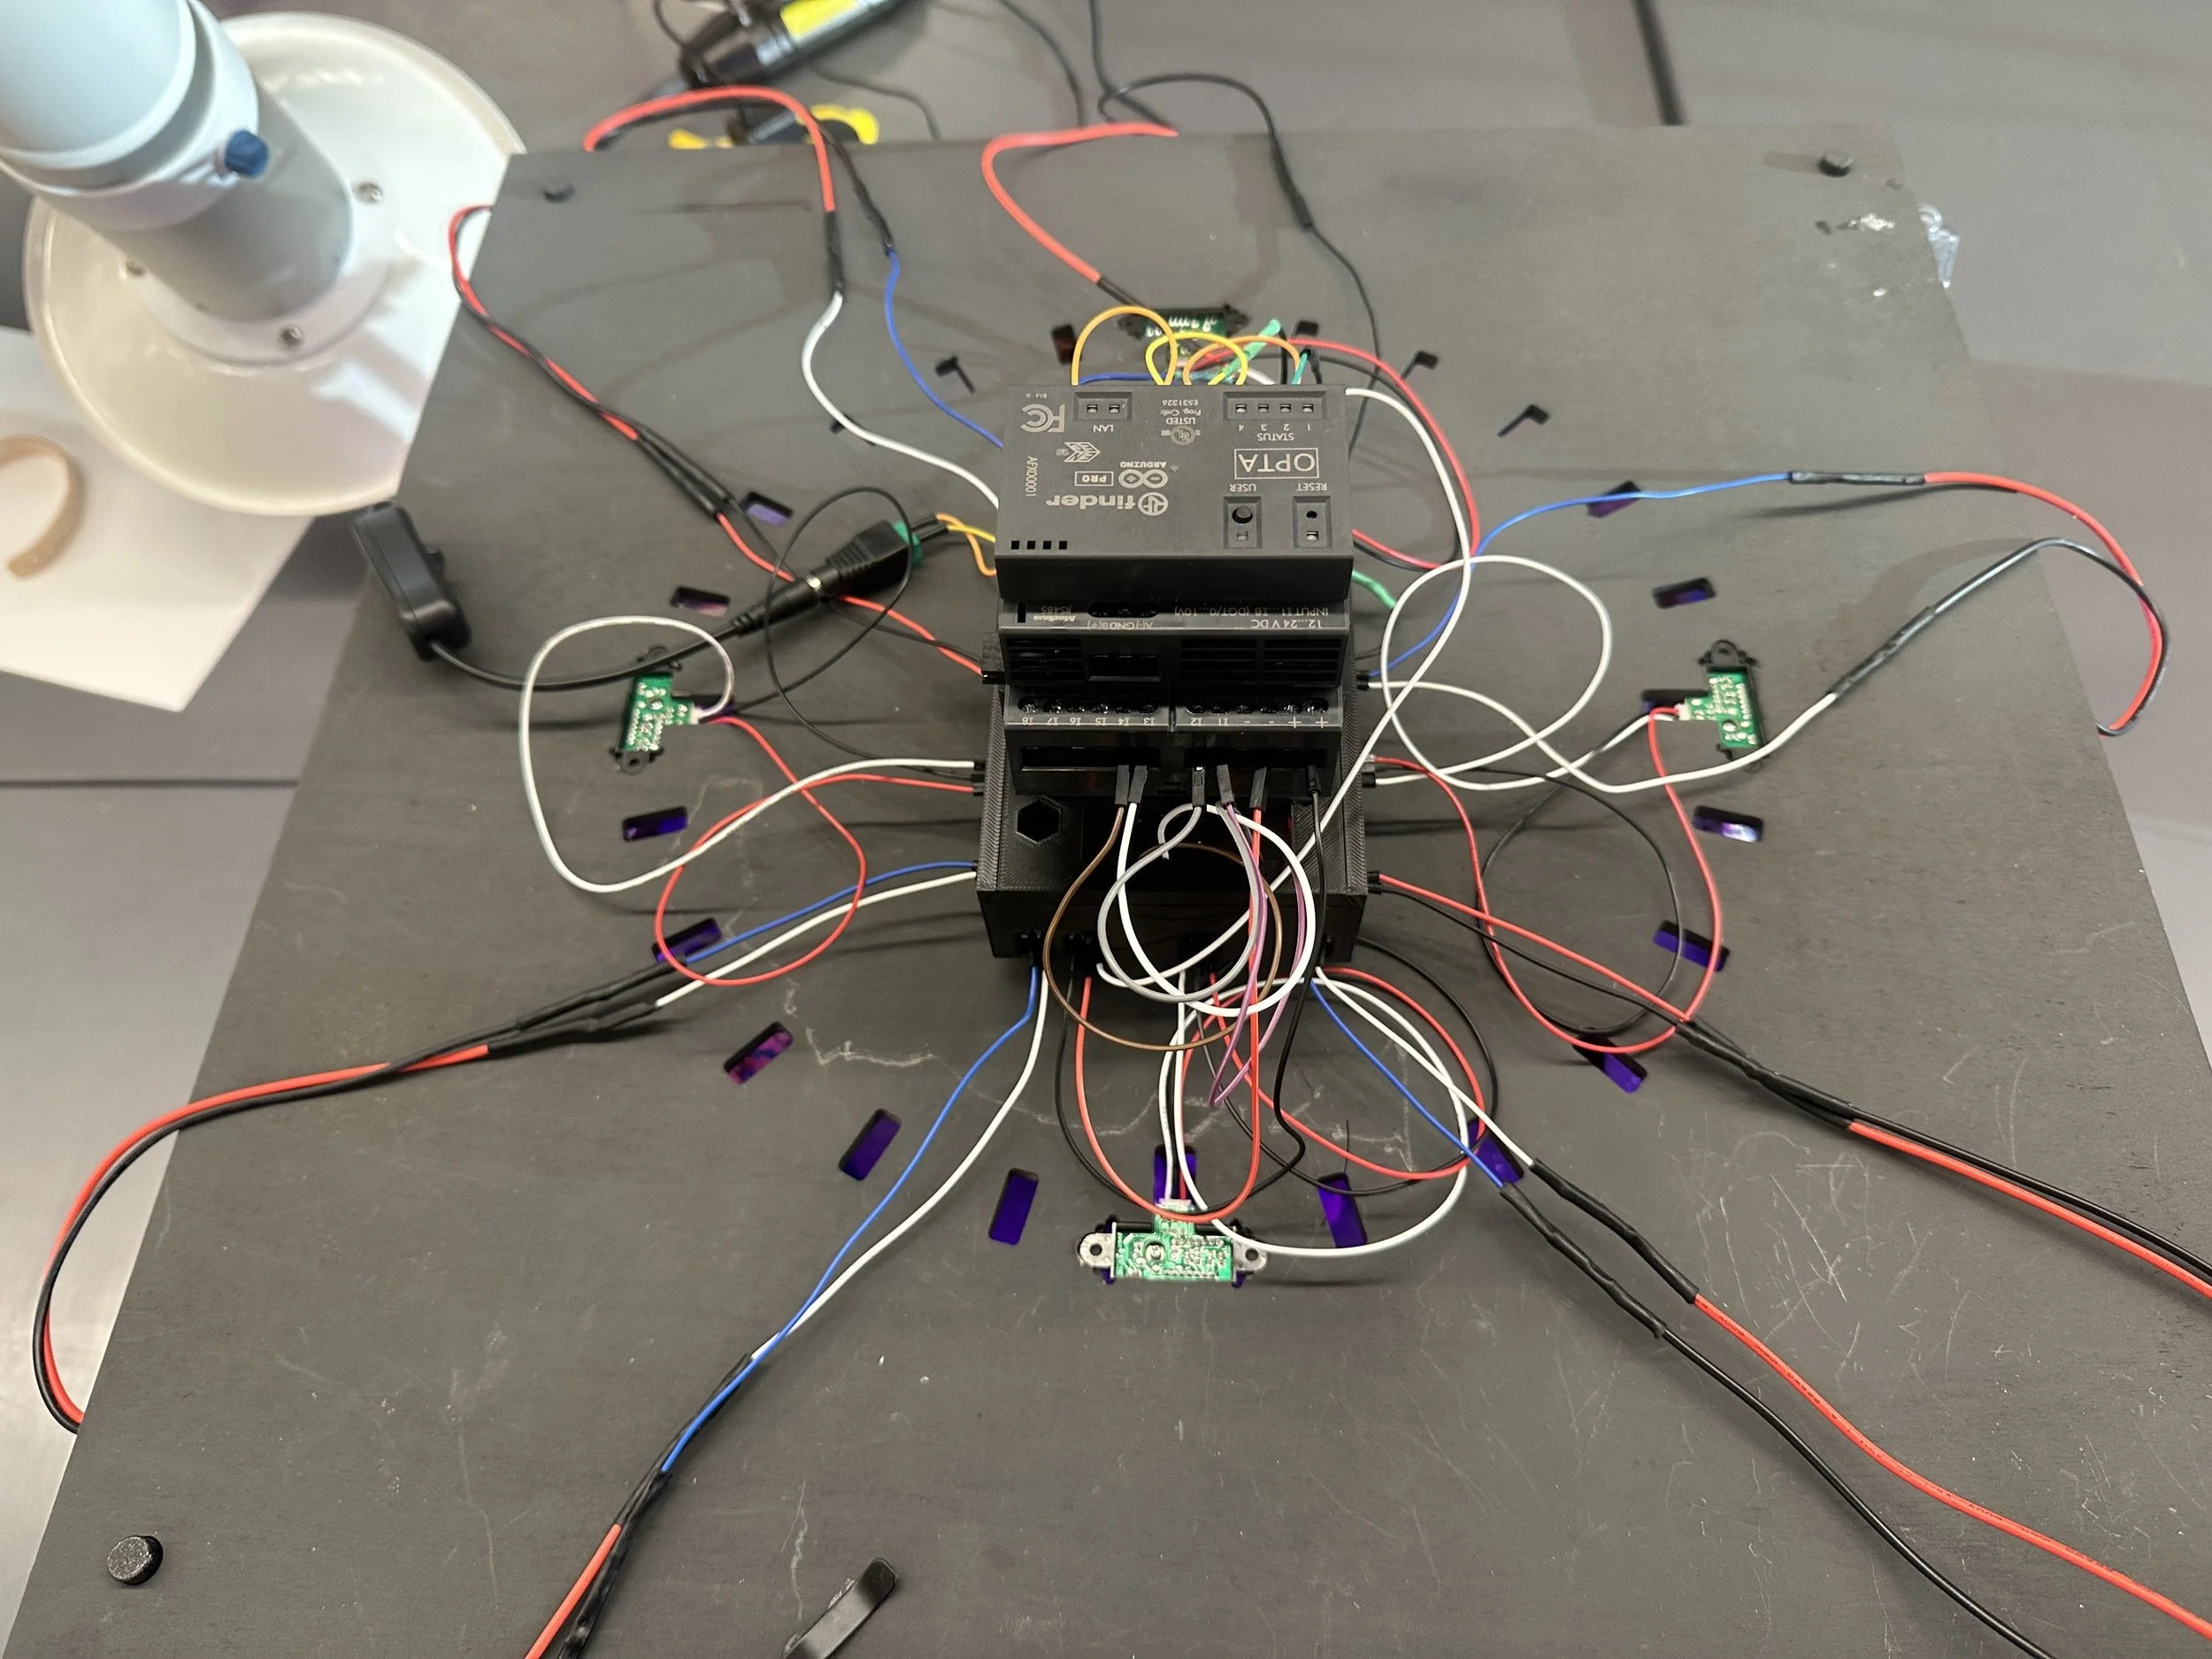
The entire system is controlled by an Arduino Opta PLC programmed in ladder logic per the IEC 61131-3 standard. The Opta was chosen deliberately: it's an industrial PLC with the deterministic timing and operational robustness the ride needed, while remaining accessible to program and integrate with the rest of the build.
The stepper driving the turntable can technically track displacement by counting steps, but step counting is open-loop — under load, steppers overstep, understep, or miss steps entirely, with no feedback to catch it. Relying on it for vehicle position would have produced show-timing drift at best and full ride failures at worst. Instead, IR sensors embedded in the roof monitor each zone of the attraction continuously, and show elements only trigger when the ride vehicle is actually present beneath a given sensor. This closes the loop on vehicle position: show timing stays correct whether the vehicle runs fast, slow, or stops entirely.
The control architecture splits responsibilities deliberately. The PLC owns all timing-critical decisions — sensor reading, threshold logic, zone activation — running deterministically in ladder logic. A microcontroller in the floor of the attraction handles servo motion commands, which are computationally heavier but don't need hard real-time guarantees once the PLC has decided when to fire them. Timing on the deterministic hardware, motion on the dedicated hardware.
Signal Chain
The architecture also keeps the analog signal path intentionally short. Routing the IR sensors' analog outputs from the ceiling down to the floor-mounted microcontroller would have exposed those low-level signals to EMI from the stepper drive, the servo PWM lines, and the lighting circuits running through the structure. Instead, the analog signal terminates at the PLC near the sensors, and only a clean 5V digital logic signal travels down to the microcontroller — far more robust against noise over distance than millivolt analog levels would be.
The flow per zone:
IR sensors mounted in the ceiling continuously monitor for the ride vehicle's presence and feed an analog signal to the PLC.
The PLC compares that signal against a threshold defined in the ladder logic and activates the zone when the threshold is crossed.
On activation, the PLC closes one of its on-board relay outputs, passing a 5V logic-high signal down to the microcontroller on the floor. The relay contact also provides electrical isolation between the PLC's output stage and the microcontroller input, so noise or faults on the control side stay on the control side.
The microcontroller commands the servo motors for that zone to their target angles, while the PLC retains full control of sensor reading and timing.
Power & PCB
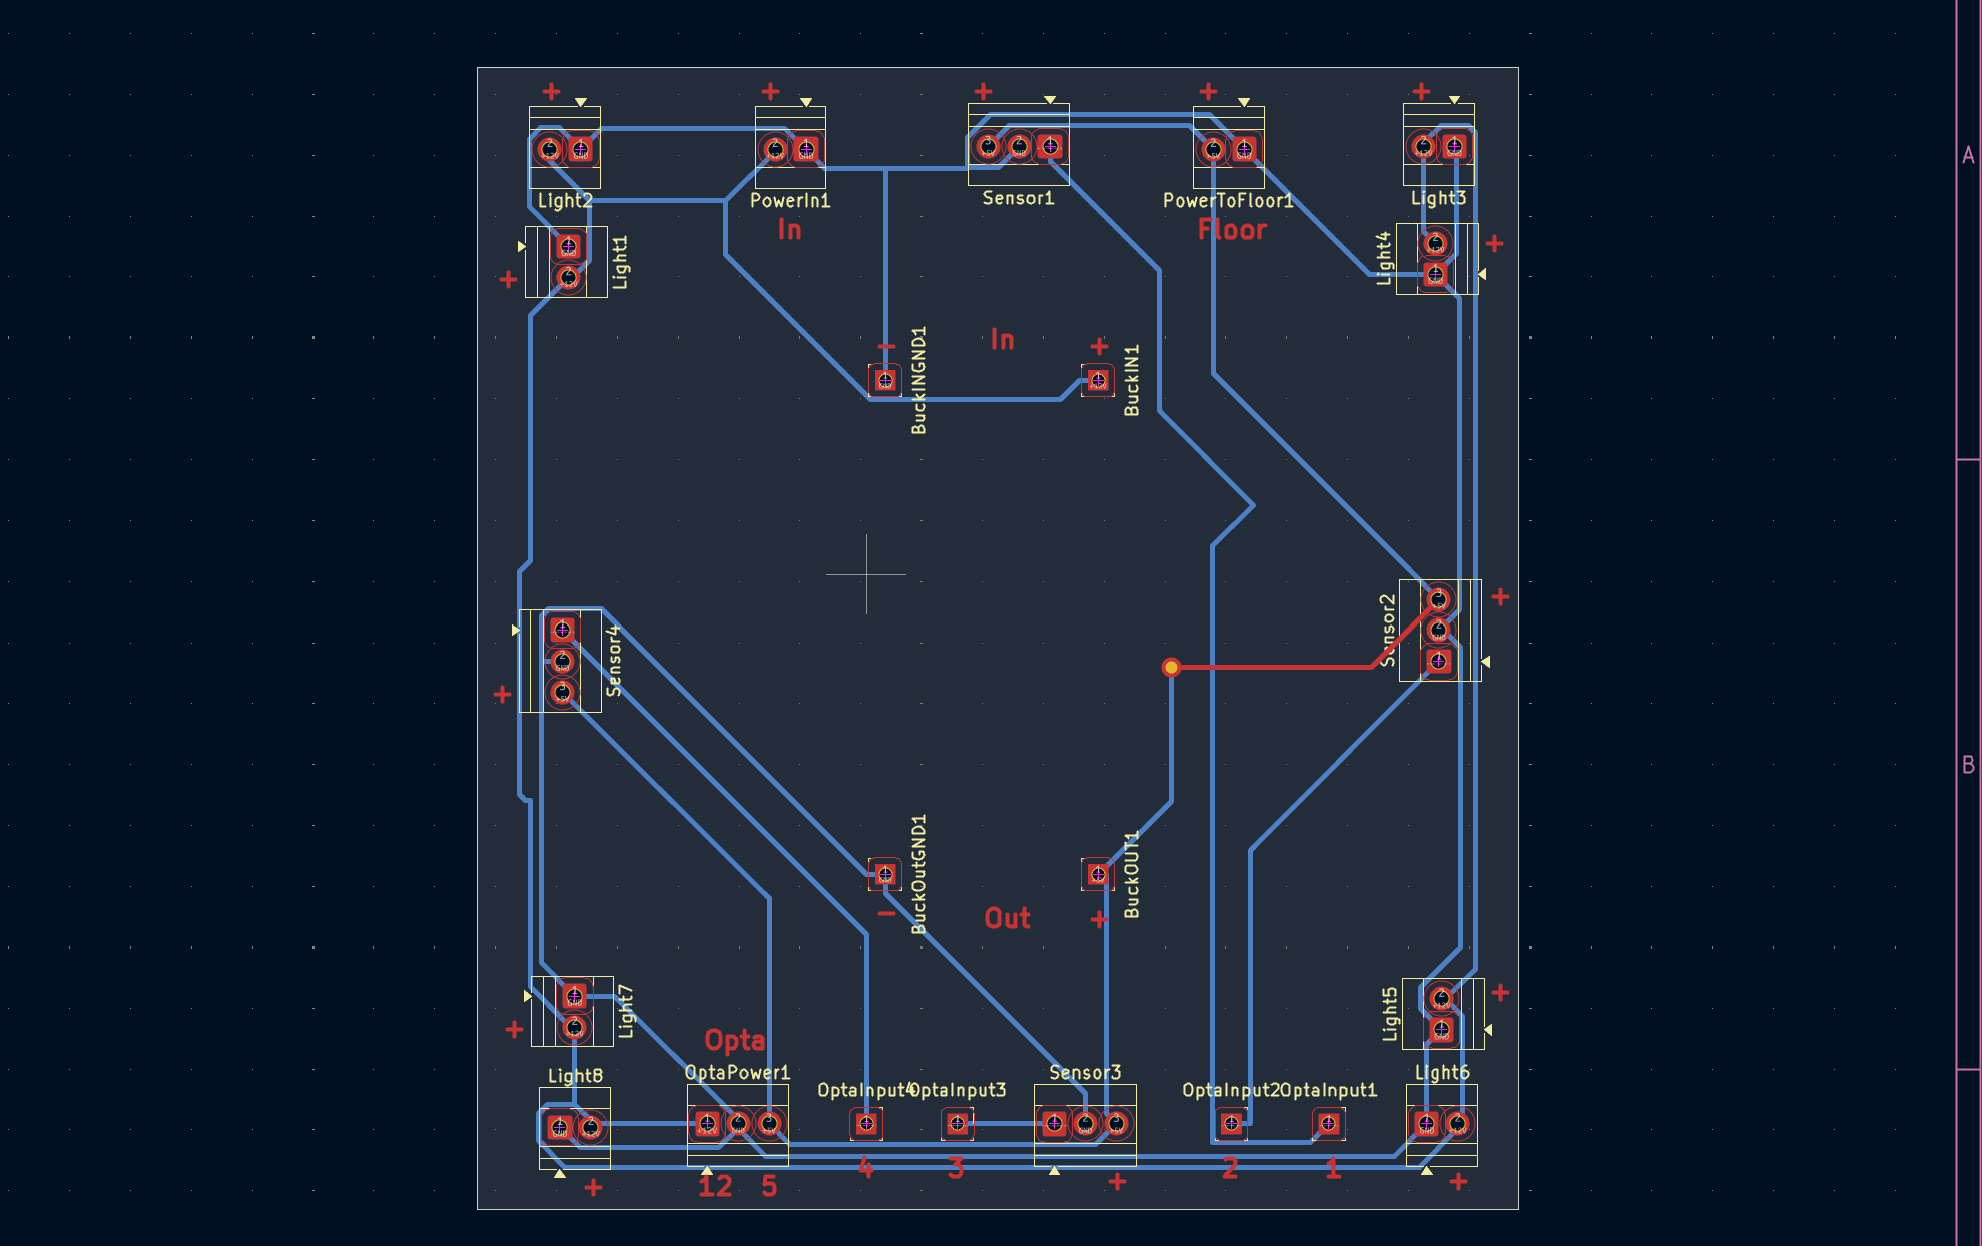
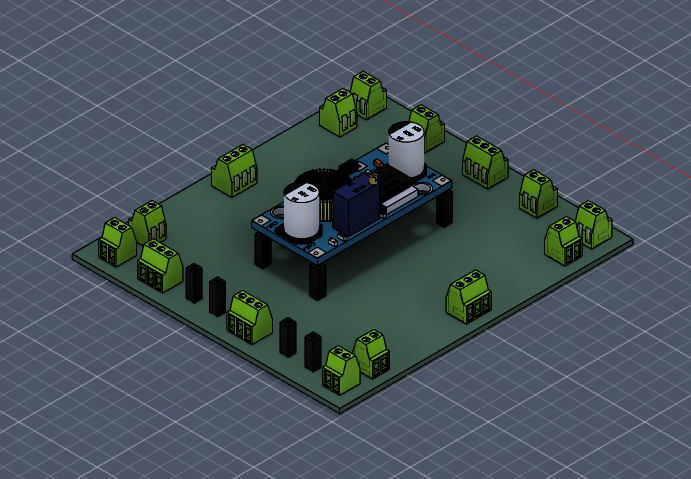
I designed a custom PCB in KiCad to handle signal routing and power distribution across the lighting, microcontroller, and PLC, and fabricated the board in-house on an LPKF S104 ProtoMat.
12V comes in to power the PLC and the lighting directly.
A buck converter steps the 12V down to 5V for the microcontroller, sensors, and relay-output return path.
A separate 6V supply powers the stepper motor and servos, which draw higher current and benefit from isolation from the logic rail.
Screw terminals were used throughout to minimize the chance of connections loosening under ride operation and vibration.

Set and Show Design
Set Design
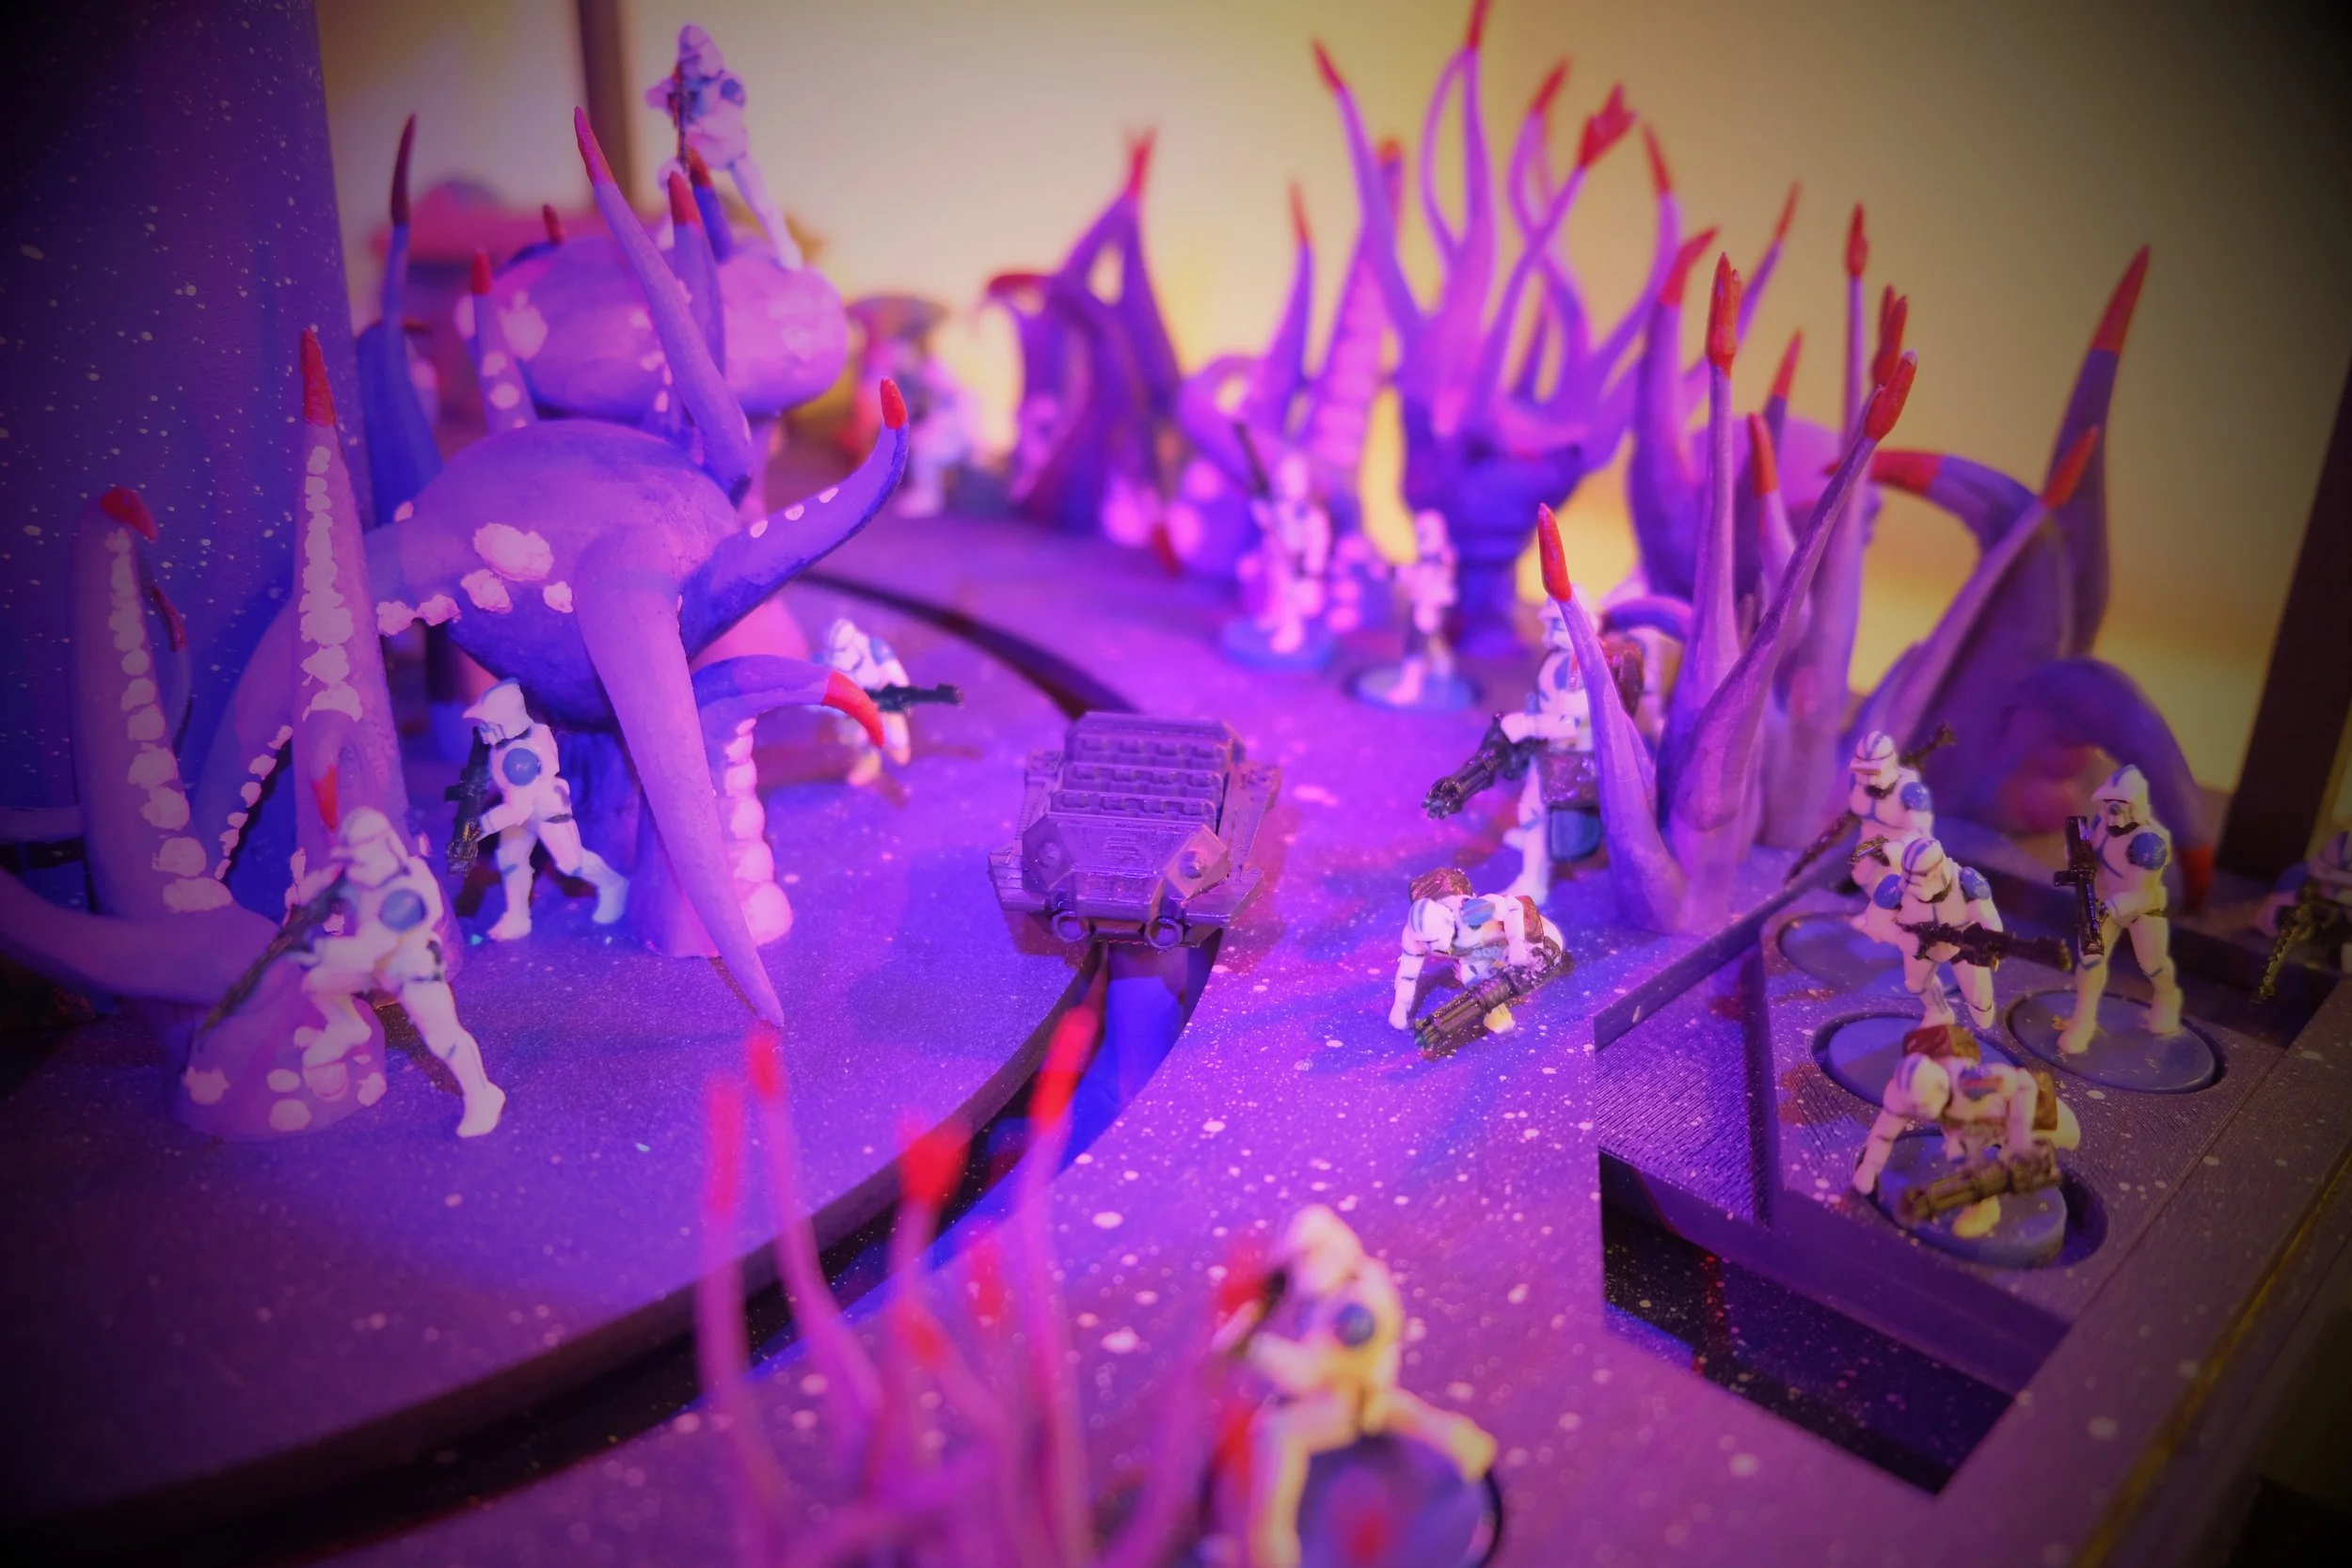
Umbara was chosen specifically for its visual identity in the Star Wars canon. The planet's perpetual twilight, bioluminescent flora, and near-monochrome palette give the attraction a built-in atmosphere that most planets in the universe can't match, and, crucially, the dark base palette lets all the lighting and characters read clearly against the environment. Visual references were pulled directly from the Umbara arc of Star Wars: The Clone Wars (Season 4, Episodes 7–10) to ensure the environment honored existing canon, the way any guest-facing environment in a licensed property has to.
World-Building
The ground and tentacled foliage are saturated purple throughout, with white paint speckled across the floor to suggest distant stars or ambient particulate.
Red and purple fixtures mounted overhead wash the entire scene in Umbara's signature twilight. These are kept always-on as a static atmospheric layer rather than a programmed cue, so the world reads as Umbara from the moment the guest sees it.
The foliage pods are painted with UV-reactive red pigment and activated by a black light aimed at a specific section of the ride. This recreates Umbara's bioluminescence without putting electronics in every plant, and creates a clear visual focal point as the turntable rotates past.
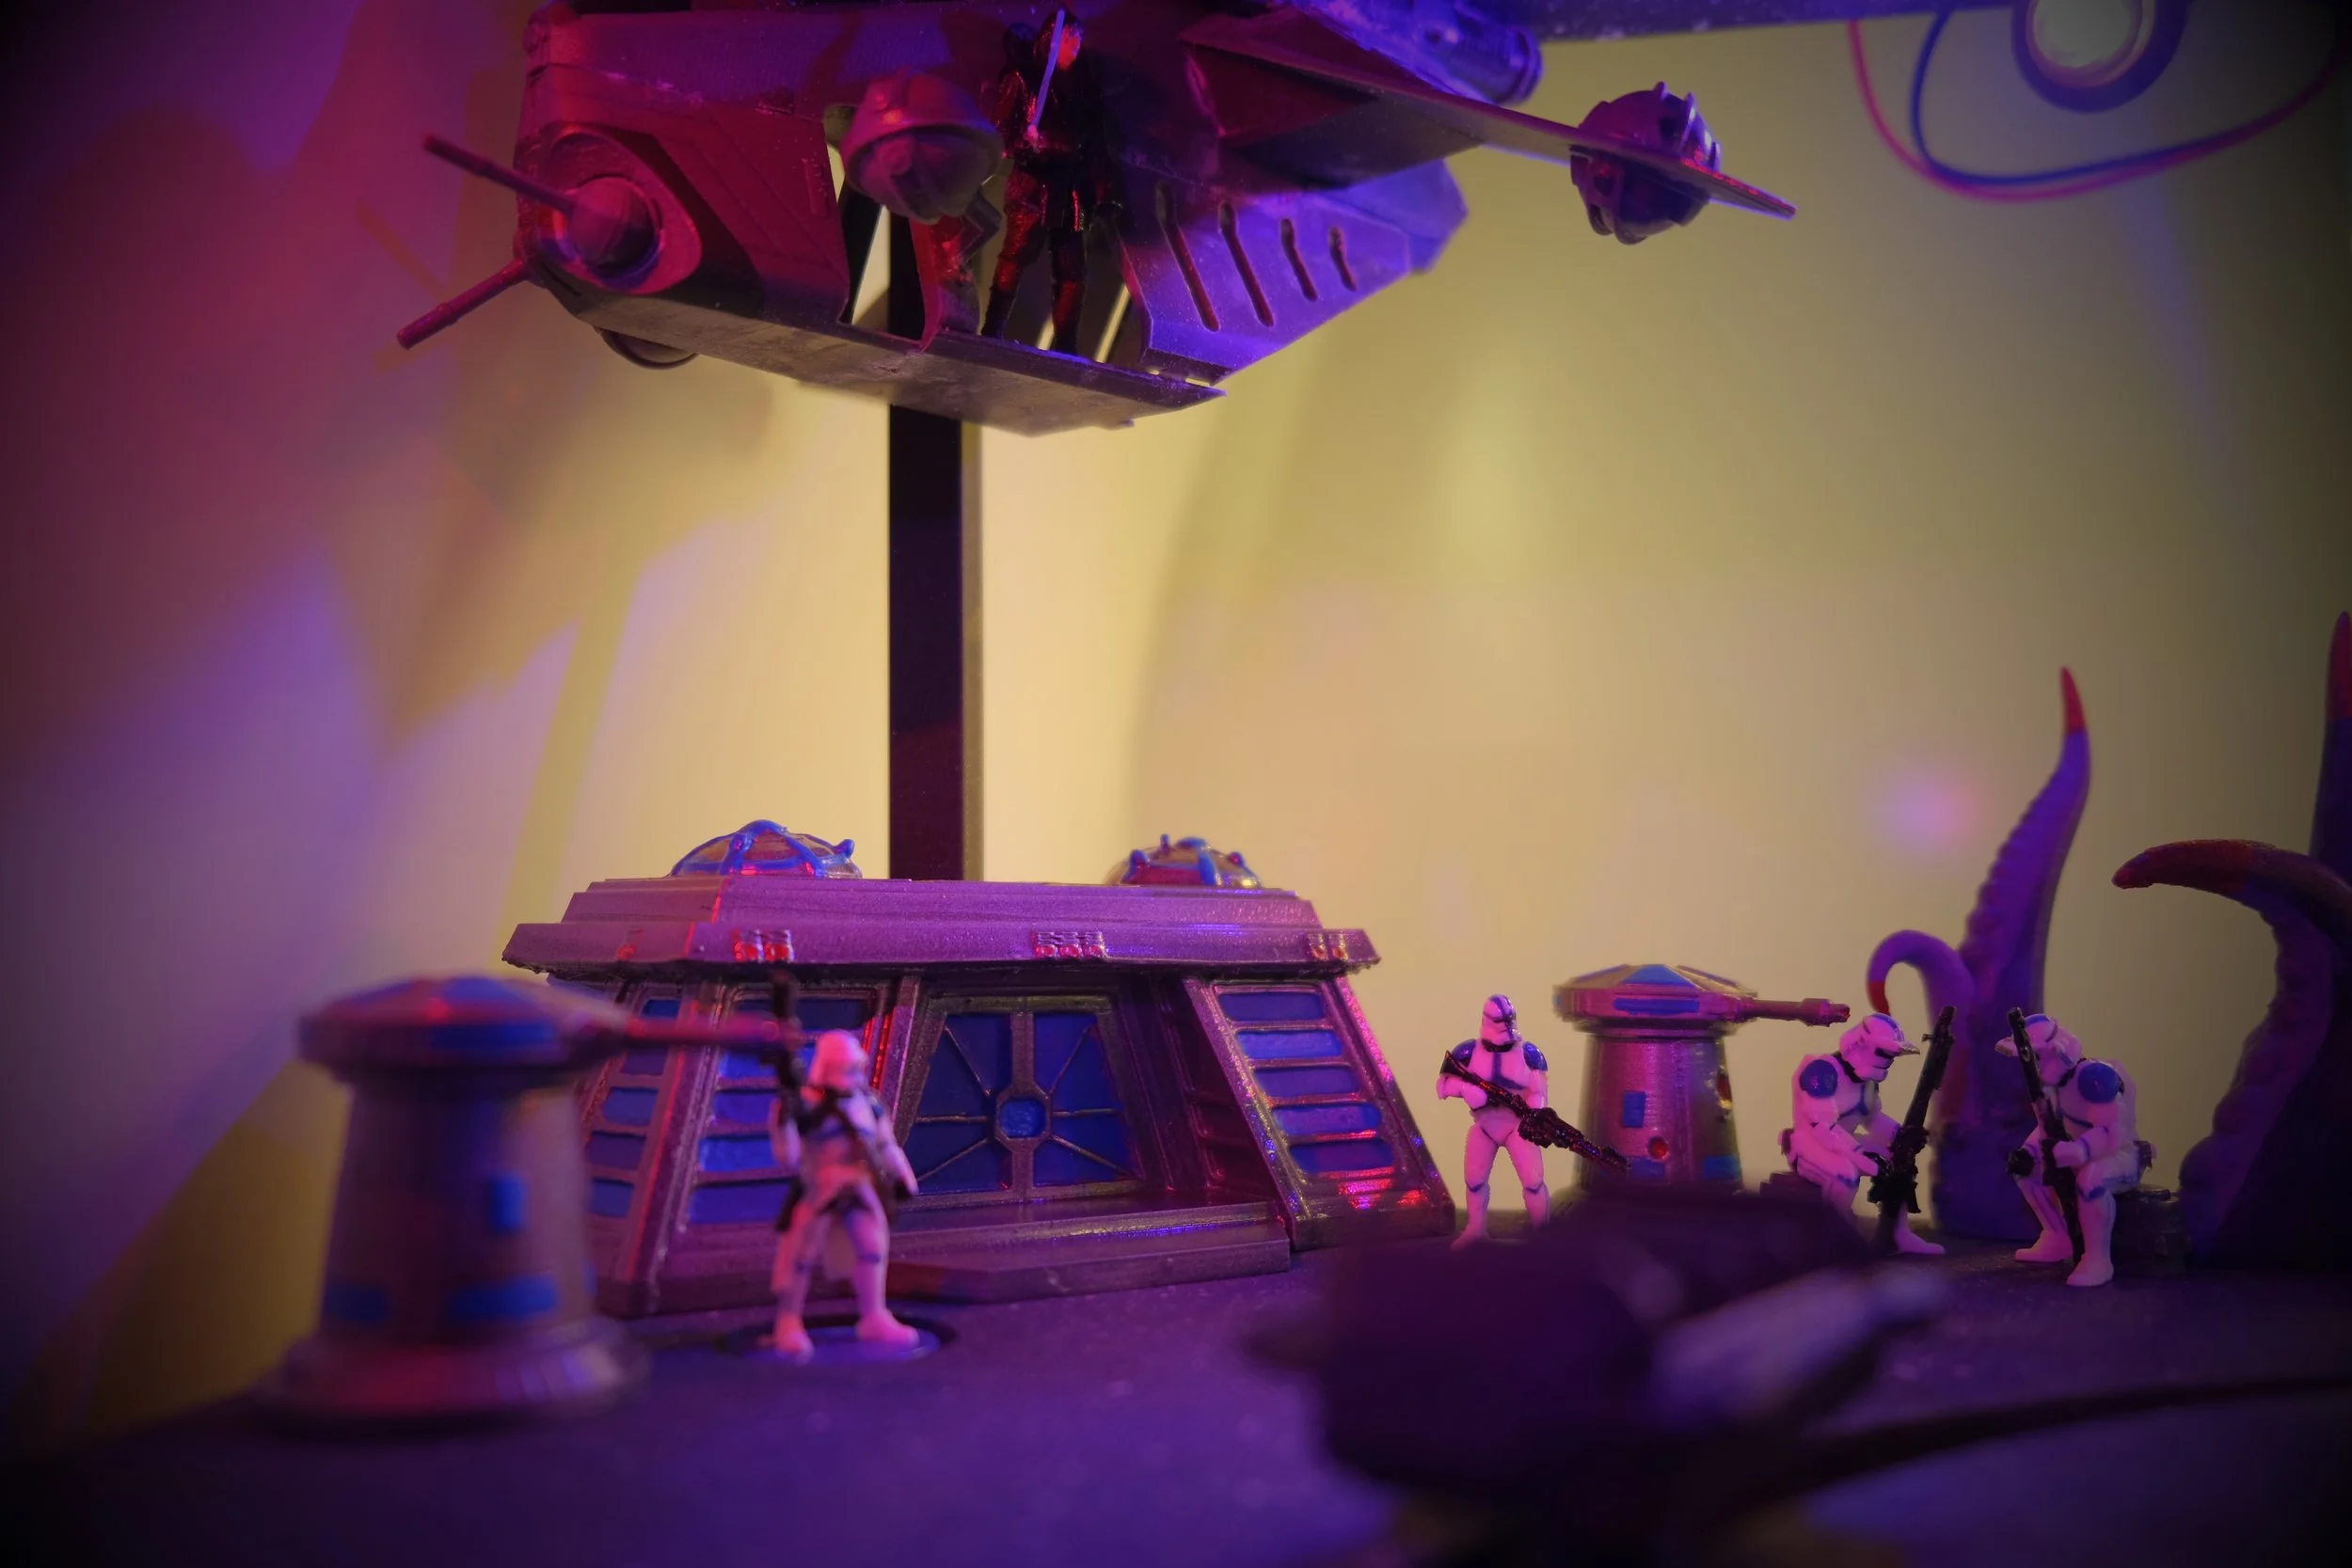
Narrative Staging
The ride opens at a Republic clone base with a parked gunship, Anakin, and clones staged in formation, anchoring the guest on the Republic side before the turntable carries them into hostile territory.
The droid factory is finished in a gold-brown-tan palette that intentionally clashes with the purple environment, making the Separatist facility read as an industrial intrusion on the landscape.
Inside the factory, droid parts sit on a stationary conveyor belt. The implied motion gives the guest a clear "this is what we're here to stop" beat without activating background dressing, a deliberate choice not to spend a motor where implication carries the story just as well.
Fabrication
Terrain and buildings were FDM-printed in PLA on the Prusa Core One and Core One+, using neutral filament that was then sanded, primed, and hand-painted.
Foliage was also FDM-printed in PLA. The J850 didn't have UV-reactive resin available, so printing in neutral PLA and hand-applying UV-reactive paint to the pods was the only path to the bioluminescent effect described above.
The Republic gunship was printed in sections on the Stratasys J850 and assembled after the fact, taking advantage of the J850's surface quality for the vehicle's smooth panel work.
The droid factory was printed as a single piece on the Prusa Core One L, whose larger build volume allowed the entire structure to come off the bed without seams or assembly required.
Every printed scenic piece went through a full sanding pass for layer line removal, a primer coat, and finish paint. This was a deliberate choice over multi-color resin printing; the FDM plus handfinish workflow scaled across the volume of scenic material the ride required in a way resin couldn't.

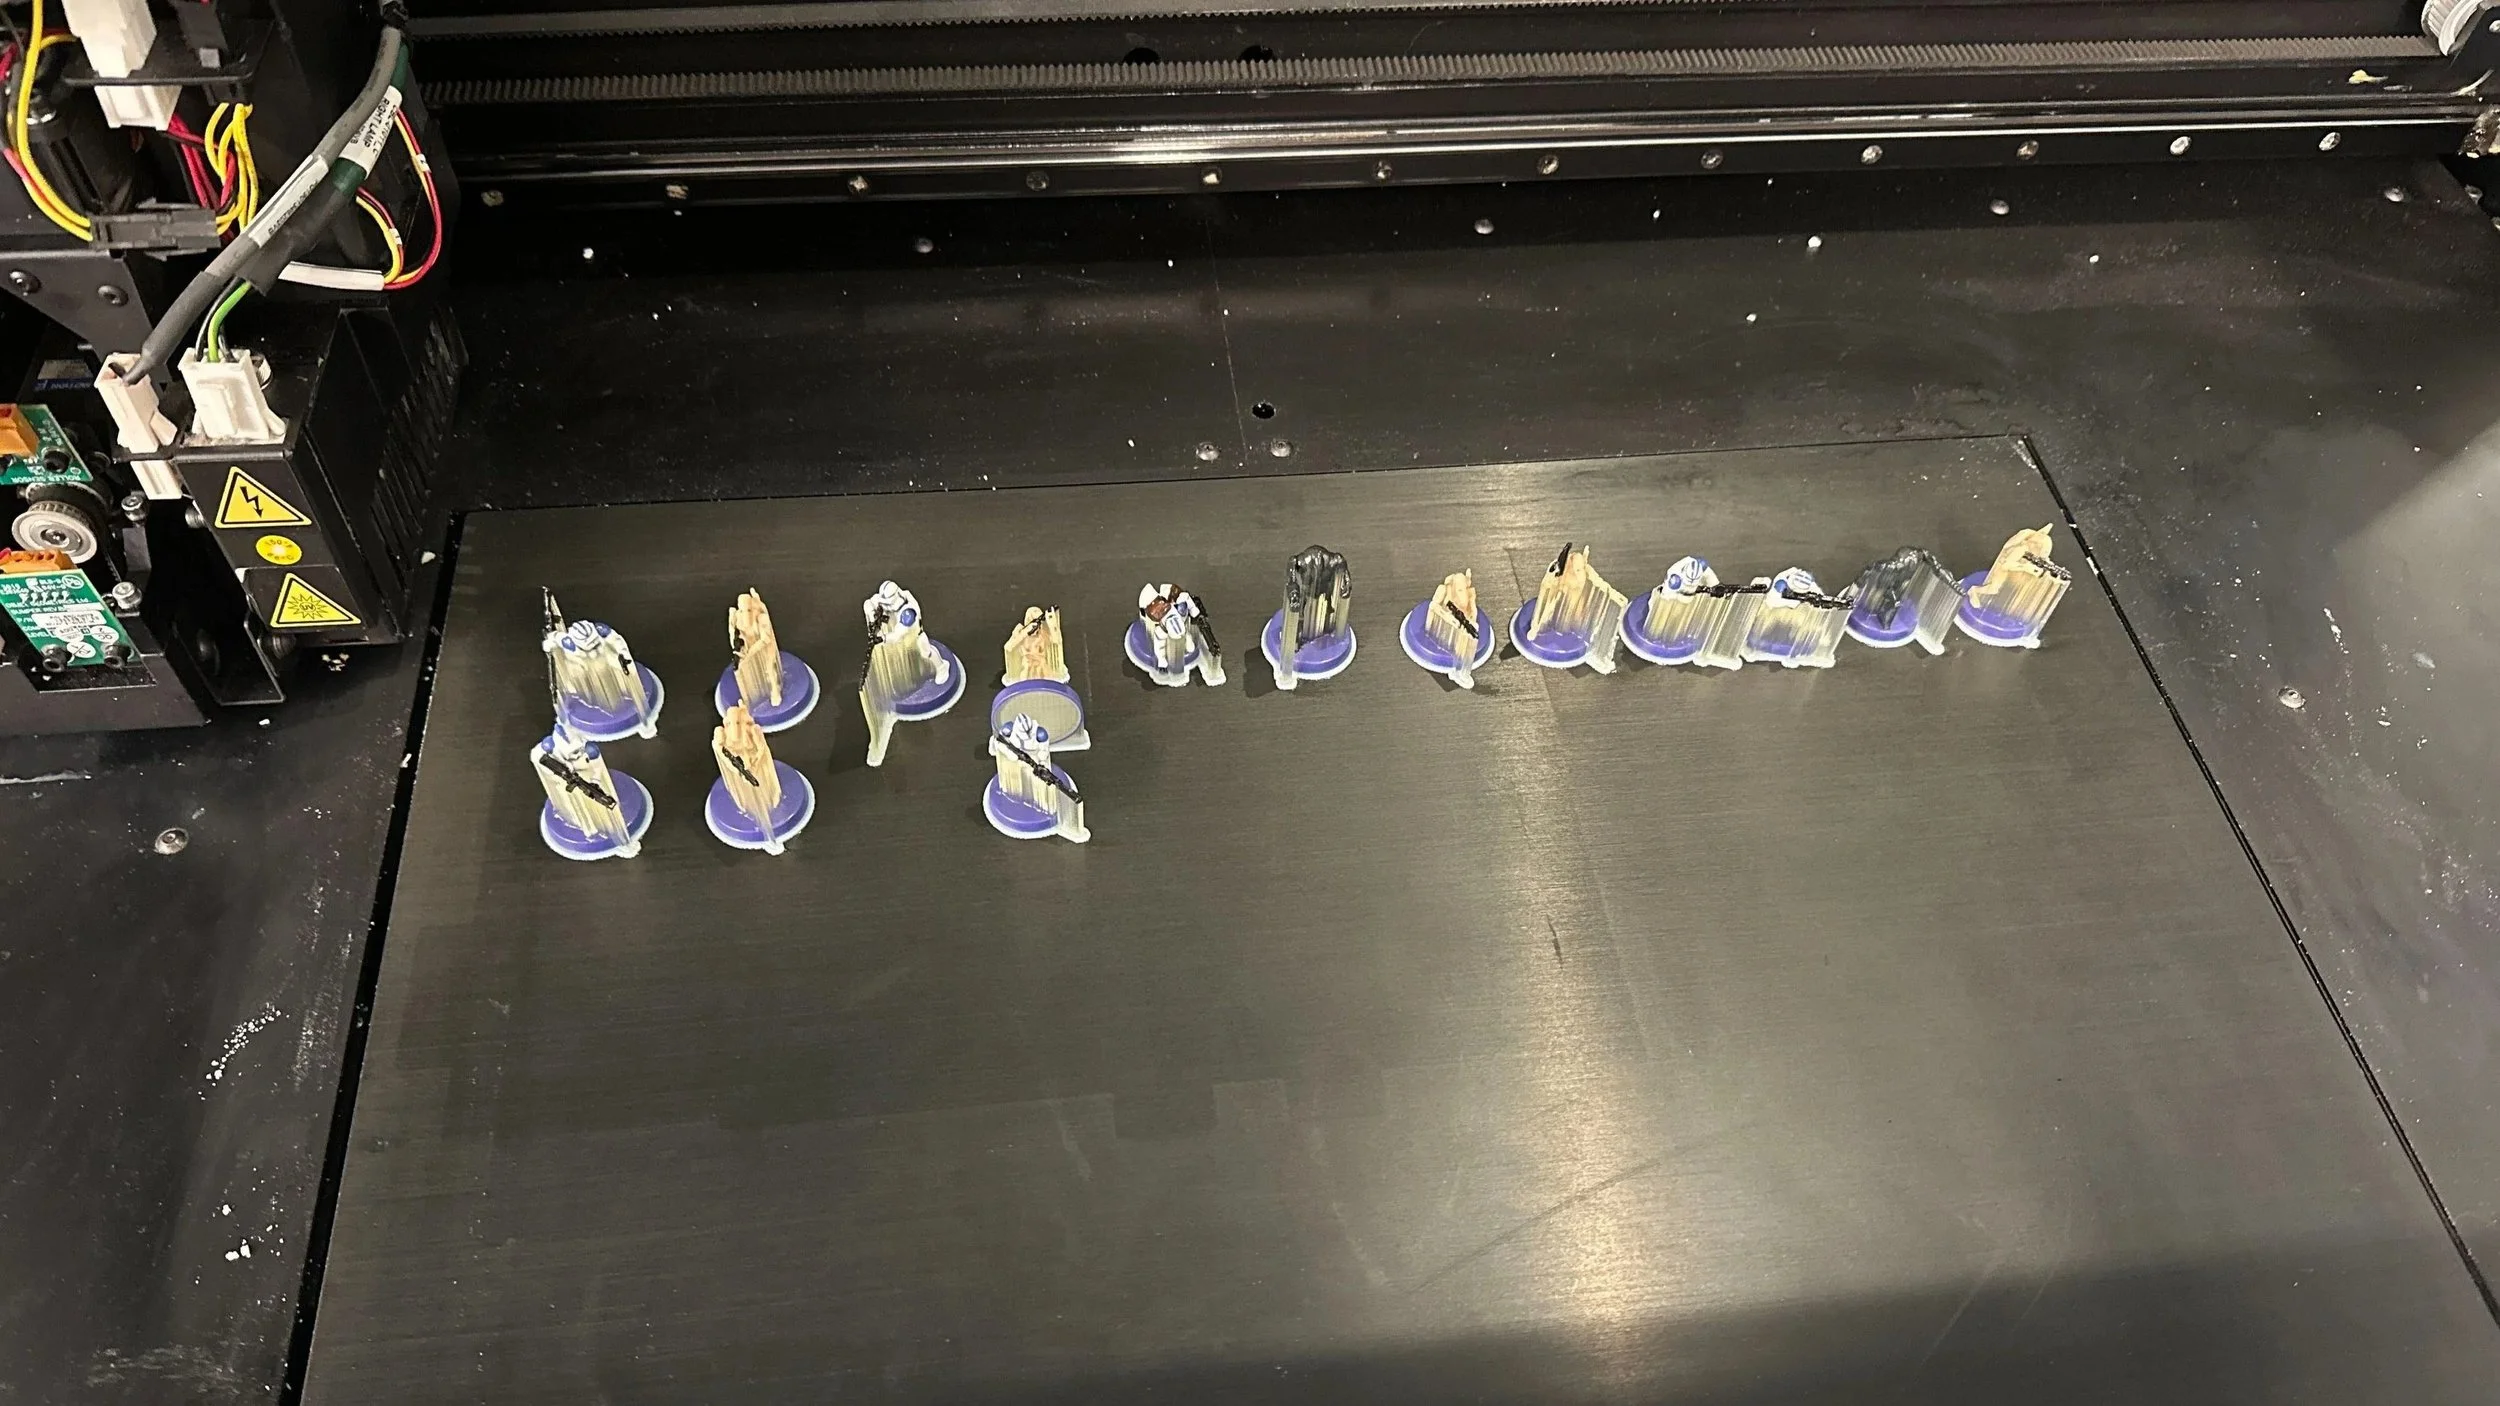
The Characters
Every figure in the attraction was 3D-printed in full color on a Stratasys J850, a PolyJet printer capable of depositing multiple resin colors in a single print. Hand-painting forty-plus characters at 1:48 scale would have eaten weeks and produced inconsistent results across the roster, so the J850 was the workflow that scaled at character scale and character volume, while FDM plus handfinish was the right call for the larger scenic pieces. Different problem scopes, different fab decisions.
Character models were sourced from Galactic Armory's library of Star Wars 3D assets to keep the figures canon-accurate, with the engineering effort focused on the systems around them rather than on modeling. Color was applied directly to the model files in Microsoft 3D Paint, a lightweight tool that proved sufficient for vertex-level coloring at this scale, with no need to reach for a heavier package before the files were sliced for the J850.
Roster
Anakin Skywalker and an assortment of clone troopers staged throughout the attraction.
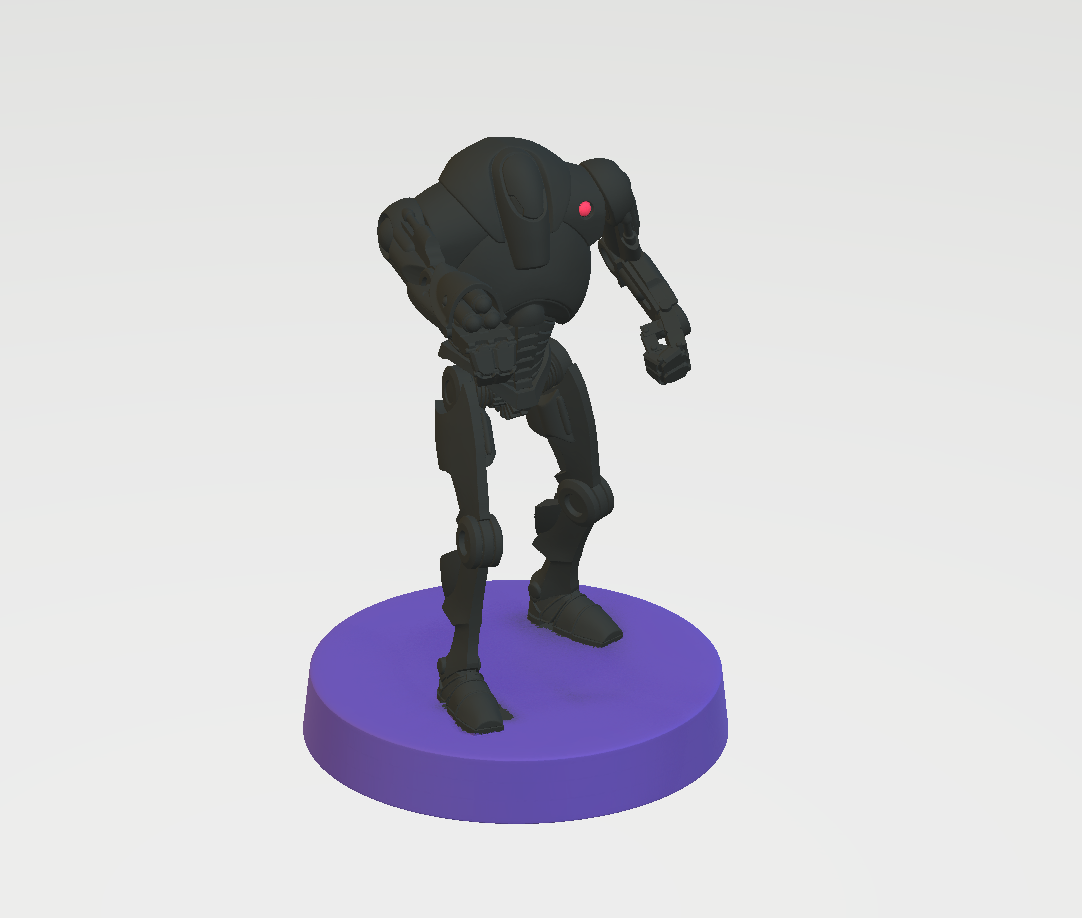
B1 Battle Droids and Super Battle Droids are placed across the ambush and factory zones.
Print Workflow
Models pulled from Galactic Armory, with the default circular display base removed on most characters to let them sit naturally in the scenic terrain.
Color was painted directly onto the model files in Microsoft 3D Paint before export to the J850.
Characters were printed at roughly 1:48 scale. Microsoft 3D Paint introduced some scale variance during export, so per-character sizing was tuned to land near 1:48 while preserving silhouette detail at print resolution.
Post-processing was limited to support removal in the J850's lye bath, no sanding, sealing, or topcoat required, thanks to the multi-color resin finish coming off the machine ready to stage.